Showing posts with label Practical. Show all posts

Sunday, 15 December 2013

Photography for Killer's Notebook

  Our killer takes photos of their victims (whilst they're stalking them and after they've been killed) and puts them in their notebook, which reflects upon their obsessive nature.
  Our first photo-shoot took place on 10th December 2013, and our first victim was played by Cara Lai Cullinane.

  • The locations Megan decided to use when preparing for the shoot all centred around the school setting.
(Outside the gates, through windows, in the street.)
  • This makes the victim's youth very clear to the audience.


  • The props we used were a bloodied shirt and fake blood.
  • A location that we didn't plan was at the bottom of stairs leading to a storage room, which we used for taking pictures of the victim after they were dead.


These are the photos that we will be using
in our opening sequence:

  • I edited them to be in black and white, as we don't feel that the killer's notebook would look as effective if it were full of colour.
  • Many of the photos were taken with window frames, walls or trees in view, to show that the killer was hiding whilst taking the pictures.
  • I also added a grainy effect to the pictures, or a motion blur effect, as the killer would not have had a lot of time to take the pictures as they must ensure that they are not seen by their victims.

  • Overall, I feel that these pictures will be effective for our killer's notebook, as they clearly show our killer's process of stalking before killing their victims.
  • Furthermore, the pictures could also be used on our killer's wall of photographs and newspaper clippings.
  • By having the pictures on the wall as well as in their notebook, the audience understands that the killer's life revolves around their murders, and that the killer has become an obsessive.
  • One problem is that some of the photos would not have been easy to take without the victims noticing, and so these pictures cannot be used.


Sunday, 8 December 2013

Killer's Souvenir Jars

Inspired by American Horror Story season 1, our killer will have body parts kept in jars around their workspace in their basement, to reflect upon their obsessive mindset.


  • I created the shape of a severed finger and some teeth from plasticine.
  • I used a craft knife to make many thin indents on the finger, to make it appear shrivelled from being in a jar of chemicals for a period of time.
  • I also made the plasticine into the shape of a bone protruding from the bottom of the finger, to show that it had been taken from a living person.


  • I then used acrylic paint to paint the finger.
  • I used yellows, blues and reds, which had the effect of making the finger appear to be decaying.
  • I painted the teeth white and yellow.


  • I put the teeth in an empty jar with a little fake blood.
  • I put the finger in a jar of water with some diluted fake blood as well as some ochre yellow paint.
  • In the third jar, I filled a quarter of it with fake blood.


  • We will use these jars in the set of the basement scene, which is where the killer tortures and drains the blood of their victims.
  • By having features such as these around their 'workspace', the audience will become aware of their obsessive, psychotic behaviour.

Thursday, 5 December 2013

Production Company


  • At the beginning of our opening sequence, the production companies supporting our film will be displayed.  One of the companies will be an existing company, and the other will be one we have created ourselves.
  • We combined text with an animation to create a short, 3 second clip for our production company 'CHEM film productions'.

  • Each frame was drawn on photoshop.
  • I used a black and white colour scheme, with largely dark tones, to stay within the horror genre.
  • I saved the animation in a .gif format, in order to insert it in my imovie project.


This is the completed animation:


  • I used the font that (Charlie) created and layered on top of the animation.


  • I then cut the clip to be much shorter, as a production company logo should not be visible for longer than a few seconds.


Overall, I feel that this will be effective for our production company, as it stays within the horror genre and is only a few seconds long.  Initially, this was a difficult task, as the .gif file had to be converted into a filetype that imovie would recognise.  Overall, however, the outcome is effective.

Monday, 2 December 2013

Practical Source of Inspiration

WOUNDS.

Fight club (1999)

I was inspired by the movie makeup in the 1999 film 'Fight Club'.
In particular, the special effects cuts and wounds.


To recreate the wounds seen in fight club, I used:
  • Liquid Latex
  • Fake blood
  • Acrylic paints

1. I applied the liquid latex to the areas where the wounds would be:
(When dry, the latex is clear:)
2. Using scissors, I cut into the latex:
3. I then painted into the 'wounds' using red, blue and brown acrylic paints:
I did the same for the other 'wounded' areas:
4. Using a sponge, as well as simply pouring it on, i added fake blood to the wounds.  I also used the fake blood to create a nose bleed effect, inspired by the image from 'Fight Club' seen above.


Strengths
My strengths centre around the creative arts.  I believe that this will be helpful to my group as I can storyboard clearly and create special effects such as those demonstrated above.

Sunday, 1 December 2013

Fatal Wounds Makeup

For this practical tasks I used special effects to create strangulation marks and a slashed wrist.


Strangulation Marks

I used this video as a guide as I have never done this makeup before:


As I did not have the same materials as the person in the video used (a bruise wheel) I used cosmetic products instead such as dark lipsticks and eyeshadows. I started by putting some of these products on my hand and placing my hand on my neck in a choking position. After I had marked out where the most prominent bruising would be, I applied more of the products and blended them to get this result:


Slashed Wrist
I did not use an online tutorial for this as I have experience in creating this kind of makeup. I first used eyelash glue to create the shape of the cut on my wrist:


 When the glue was tacky I used a cocktail stick to draw a line down the middle so that when the glue had dried the cut would be visible. I also used the stick to push the edges of the glue away from the 'cut' so they would look like raised skin. Then I used dark red and purple cream products to fill in the cut:


To finish, I applied a blood red cream product to the cut to make it look more realistic, then added fake blood to get this result:


Evaluation
What went wrong:

  • I did not have all the products used in the strangulation marks tutorial so I had to use cosmetic products which did not look as realistic
  • I did not have as much fake blood as I had anticipated beforehand so I had to improvise and make my own with cosmetic and household items, which again did not look very realistic
To improve:
  • Ensure that I have the necessary products needed beforehand so the outcome is as successful as possible
This task is useful because special effects makeup will be used in our group's film opening, so we can refer to this post to see what kind of wounds could be used on the actors in our piece.

Killer's Notebook

  In our opening sequence, the killer is seen looking through their notebook.  This notebook is where they plan and document their killings.
  I used a plain, black, leather notebook and modified it to appear old and well used.
  We want the book to look old, as this will reflect on the fact that the killer has been planning and taking victims for a very long time.
  • Using scissors, I made scratch marks on the surface, and cut small incisions into the edges of the book.
  • I used black acrylic paint to make permanent smudges on the surface of the cover.
  • All of these features make the book look old and well used.
  • I also scratched words from the Bible onto the cover.


  • I tied the book closed with a piece of string.
  • The string is frayed and brown to show that it has been tied and untied many times.


  • I folded over A4 pieces of paper and slipped then into the book.  I also folded one piece over many times and put it in the centre of the book, to make it appear thicker.
  • This had the effect of making the book appear to be full of information.
  • I cut into the edges of the paper as well, and used a tea bag to yellow them.  This made them appear older.


  Overall, this book would be effective for our opening sequence, however, I feel that another, larger one will need to be made as this one is too small.

Sunday, 24 November 2013

Practical Task

For this practical task I created a desk space for an obsessive killer. For our opening sequence our antagonist is obsessed with the idea of beauty, so I experimented with this idea by using dolls in this task.


I used the scrapbook entry from a previous task to reinforce the idea of this space belonging to someone with obsessive, unhealthy characteristics. I also arranged photos of the killer's potential new victims next to the scrapbook, as if the killer is waiting to add them to the scrapbook soon. The dolls were arranged at the head of the desk so they are visible at every angle and are a constant reminder of the perfection the killer is trying to achieve. They also overlook everything the killer does, adding a creepy atmosphere to the space which is useful to us as we plan to film something in the psychological horror genre.

Evaluation:

  • This task did not go as planned; I intended to print off many more photos and newspaper clippings and arrange them all over the desk and the wall, but was unable to due to difficulties with my printer.
  • As a result I had to use personal photos and photos from a magazine, which were not enough to cover the entire space as planned and so had to be arranged differently.
  • To improve, I will attempt this task again with better preparation and more photos to successfully create the obsessive mise-en-scene as planned.

Camera Angles

Below I have looked into several different camera angles to broaden my knowledge and get a further understanding of how to apply camera angles. This task will be of great use when it comes to storyboarding and filming our film opening.


Low Angle
  • Used Natural Light (in photo)
  • Long shot (in photo)
  • By using a low angle it can increase the height of the actor
  • In low angle shots the background tends to be the sky or a ceiling
  • Low angle shots are used to create fear among an audience as well as insecurity to the viewed
  • Low angle shots can be used to show the dominance of a character.


High Angle

  • Used Natural light (in photo)
  • Long shot (in photo)
  • High angle is where the camera is elevated above the actor or object
  • High angle shots are used to make the actor seem less insignificant and weak
  • Becomes 'swallowed up' by setting


Eye Level

  • Natural Light (in photo)
  • Extreme Close Up shot
  • Used for a more neutral shot
  • Positioned as though a person was viewing the scene
  • Typically 5ft to 6ft above ground level


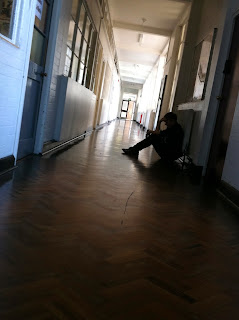
Canted Angle


  • Natural Light/Backlight (in photo)
  • Long shot (in photo)
  • Canted angles are used to show imbalance as well as instability
  • Used for suggested POV shots and hand held camera is typically used.

Bird's Eye View


  • Natural Light (in photo)
  • Show scene from directly above
  • Gives viewer a 'godlike' position due to them being able to look down on everyone/thing.
  • Can be used to make people look insignificant


Tuesday, 19 November 2013

Non-Diegetic sound practical task

This short sound clip is an experimentation with creating a soundtrack for our psychological horror film opening, inspired by the American Horror Story soundtrack.


  • The software I used was 'GarageBand.'
  • I first of all used the software to create a simple melody in minor key using a string instrument, to set the negative tone of the track.
  • I used other 'synth' instruments to create unnatural sounds.
  • The static sounds that can be heard were created by blowing air or scraping against the microphone.
  • I also recorded breathing and humming sounds and manipulated them:

  • On one of the duplications, I lowered the pitch. After recording the sound of breathing/the humming sound, I duplicated the recording two times.
  • On the second duplication, I made it a higher pitch.
  • To all three of the recordings, I added a 'reverb' effect, to add the the 'unnatural' sound.


Overall, I feel that the task had a decent outcome.  However, unless I further pursue soundtrack creation to achieve more effective results, using uncopyrighted music that has already been created would have a better outcome.

Sunday, 17 November 2013

Manipulating Text with Photoshop

For this practical task I used Photoshop CS6 to manipulate text.

I began by downloading a font called Assassins from the internet and opening it in Photoshop.

I opened the typography tool bar and adjusted the colour of the text from black to a dark burgundy colour to mimic the colour of dried blood so the text would look more sinister. I also adjusted the spacing of the letters so they were spaced slightly further apart than before.


I used a smudge tool to blur the bottom and top of the text to create contrast in the text, and also to make the text look more mysterious to conform to the conventions of pyschological horror.


Then I created a black and white gradient background with the gradient tool and used the dodge tool to adjust the colour of the middle of the text so it was brighter and the colour of fresh blood. I did this to create more contrast and make the title stand out more. 

I then experimented with different text effects to manipulate the text further, such as creating shadows around the letters or making the text look more textured


Evaluation
 
  • I found this task a little difficult as I have little experience with Photoshop and editing software so I was reliant on online tutorials and experimenting with the tools until I found the ones that were the most suitable for this task.
  • To improve next time I will familiarise myself with editing software so I will be more experienced with manipulating text and creating typography.